|
|
| Home-->F1 Rocket Project-->Engine Page 8 |
|
SITE CONTENTS
Please send your comments and suggestions to: Copyright
© 2008 by
|
Links
on this page: Engine Baffles Plenum |
|
|
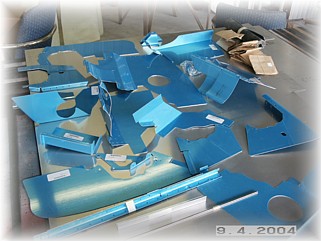
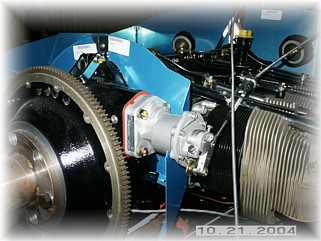
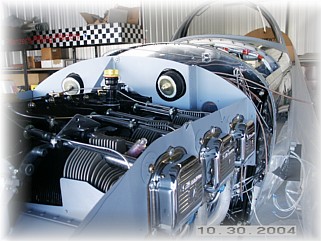
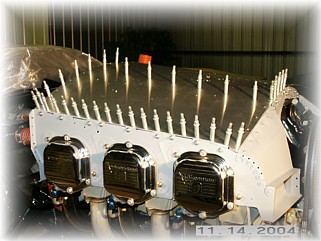
Here's a shot of the engine baffle kit that Van's now supplies for the IO-540 RV-10. It is a very complete kit with all kinds of mounting brackets, clamps, etc. I started by fitting up the right side of the engine. I had to trim out around the valve covers and along the back edge of the right rear panel. So far so good.
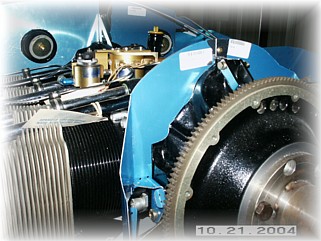
The left-side rear panel fit without too much trimming needed, as did the left side panels. You can see my preliminary trim line on the sides. Most of the side pieces will be trimmed off due to the lower cowling on the Rocket as compared to the RV-10.
The front panels required a fair amount of trimming primarily because I wasn't sure exactly where they go. I finally found a spot on the engine where the outline seemed to match and trimmed the parts to fit. The interesting thing is that on Van's kit, he routes the right front panel through the governor, rather than behind or in front of it like I've seen on other installs. I've trial fit the lower cowl openings to these pieces and it looks like they will line up with the inside edge of the openings just fine.
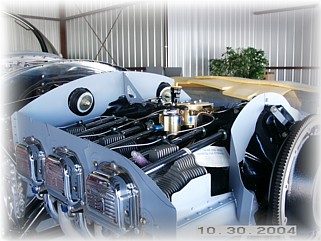
The final step was to fit the front floors. I generally followed the Van's plans but the parts didn't really fit my engine block. After a couple of days of fitting and cutting, I finished up.
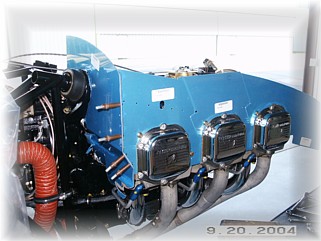
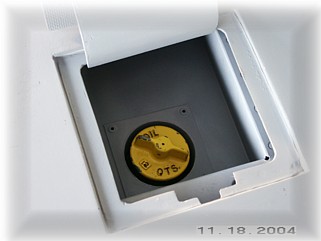
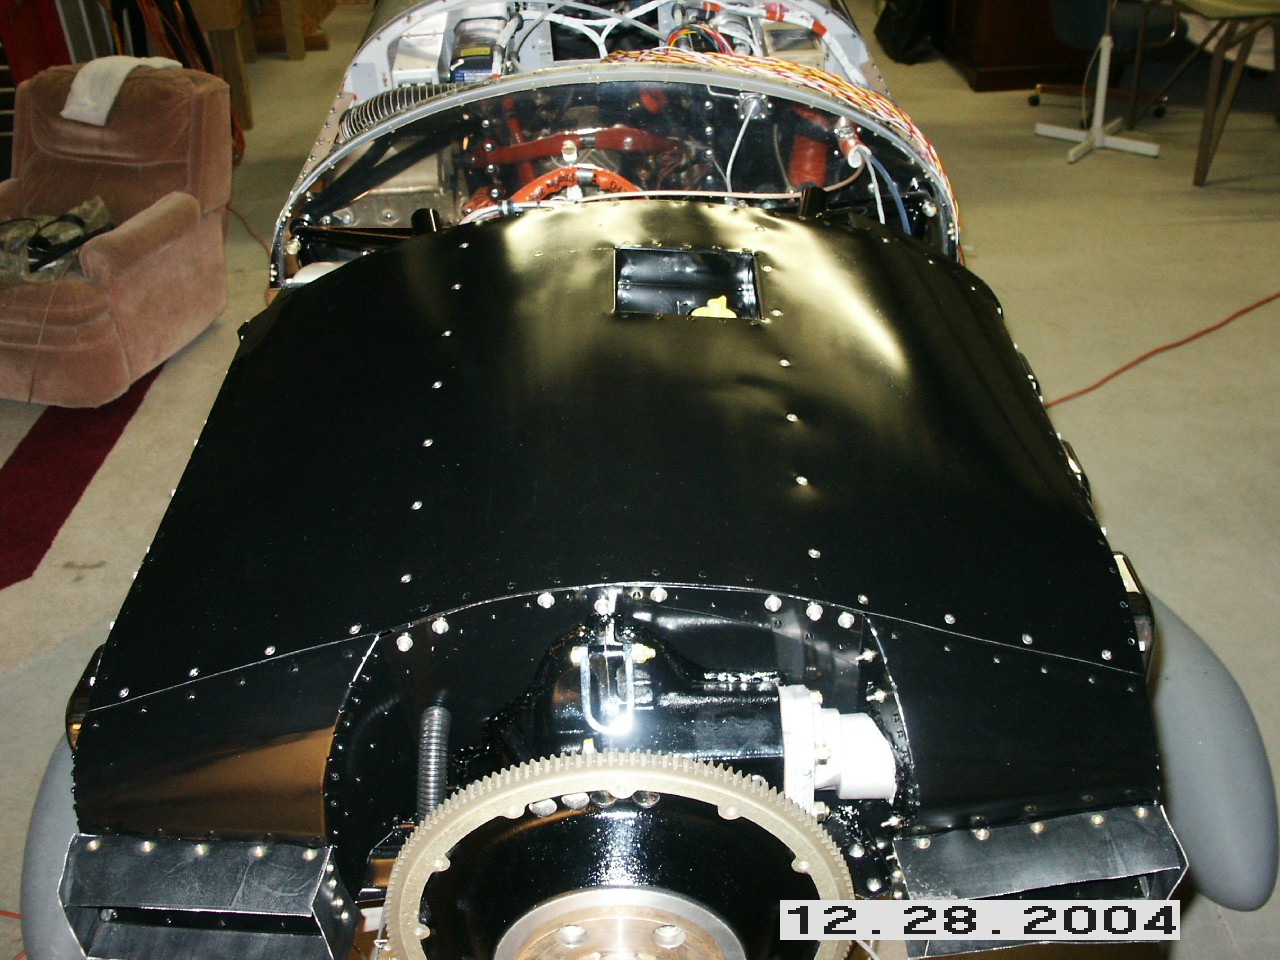
Once I had all the panels fitting and mounted, I carefully measured a trim line for the top cowl. After some trial and error, I trimmed the parts so that the top cowl would sit in its proper place without touching the baffles. I then trimmed the rear baffle panel to set about 1.5 inches lower to accommodate my oil door. I did notice that the front baffle pieces are a little short. I never trimmed these and they are installed as they came from Van's. I will probably need to add a couple of extenders to these pieces so that the plenum will clear the purge valve. My plenum top will be in three pieces. I will permanently mount the covers over each air inlet. This will allow me to accurately align the ramps with the air inlets on the cowls. The last piece will be a one piece top that will be mostly rectangular in shape. It should be relatively easy to remove that piece during maintenance.
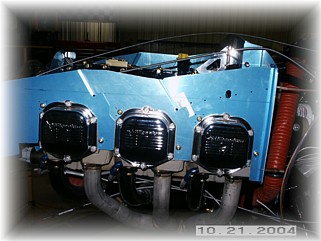
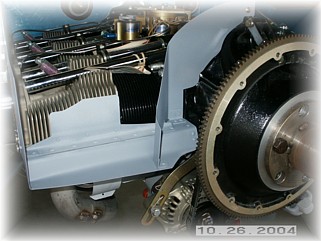
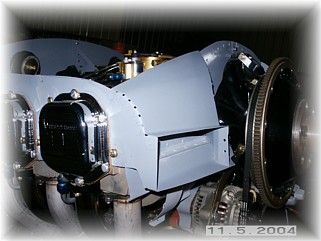
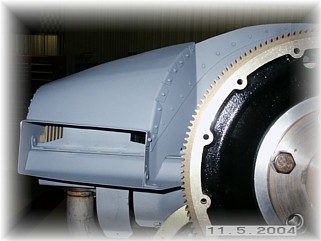
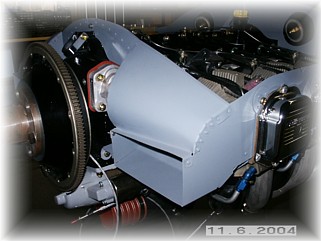
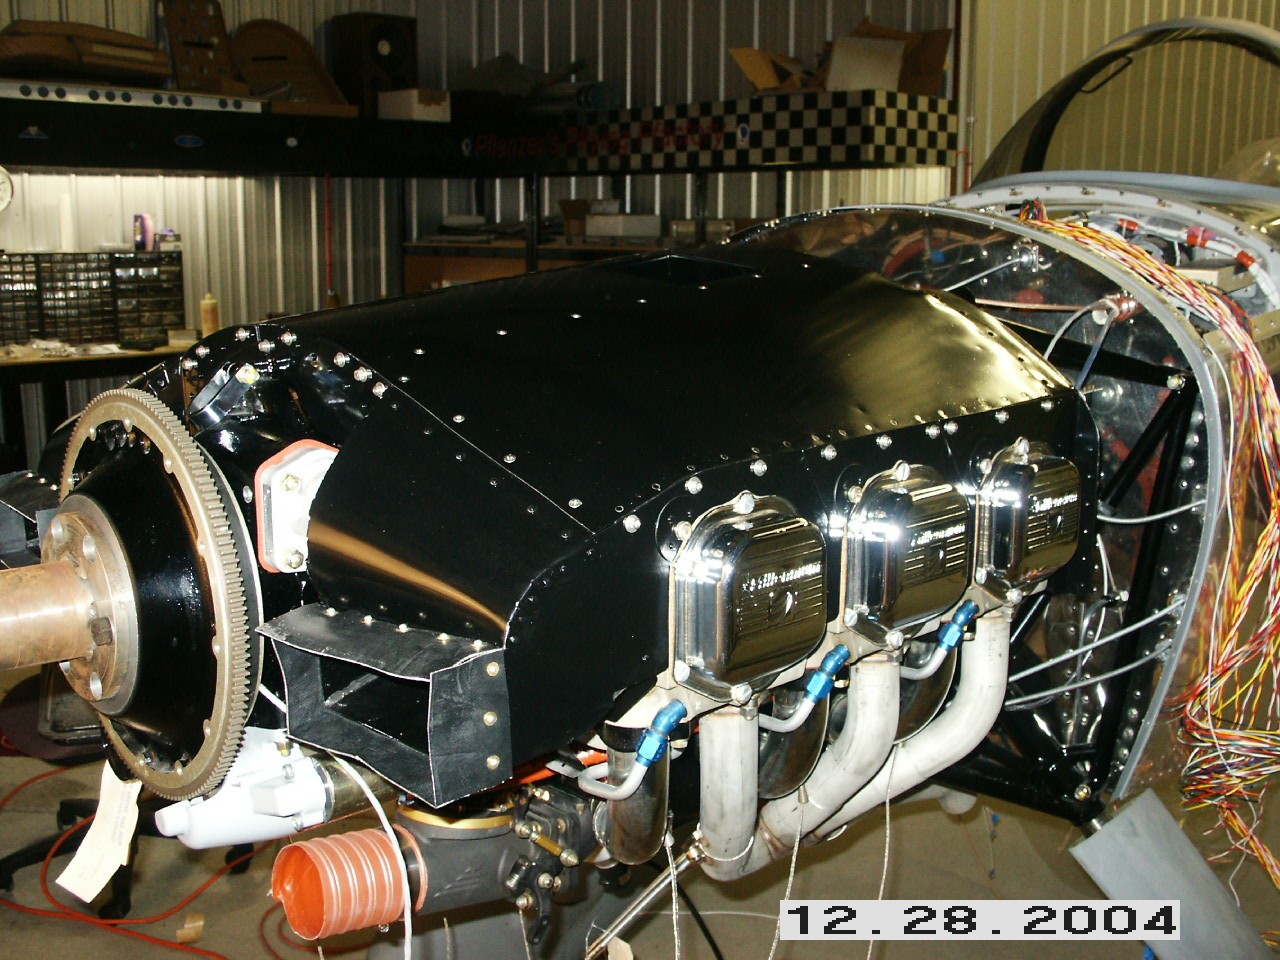
This is what the right side inlet looks like. There's a lip all the way around that will be used to mount the baffle seal around the air inlets on the cowls. I will mount those after the baffle/plenum is final painted. The openings are not exactly square either because I chose to make them conform to the cowl openings. This cover is permanently riveted to the baffle side/front/bottom and comes off all in one piece. You can also see the extenders that I added to the front baffle pieces because they were too short as supplied by Van's.
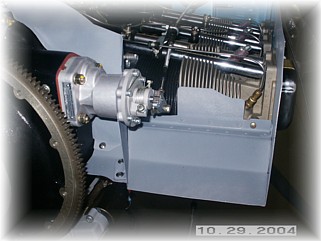
This is what the left side looks like. It's a little tricky because you can't rivet this whole thing together or you can't get it on or off. The front cover is split around the prop governor and the front piece is screwed to the floor/side/cover piece. There's really two pieces here. With the plenum cover off, it is easy to reach in behind the air inlet cover and reach the four screws that hold it together. This cover is bowed out to allow for full travel of the governor cable/arm. When it is painted and mounted for the last time, I will fill in around the edges with RTV to provide an air tight seal.
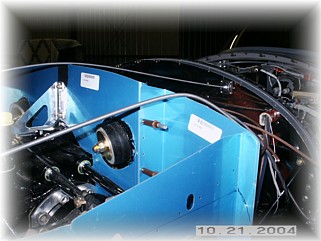
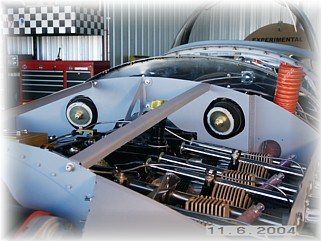
In preparation for fitting the top cover, I mounted two reinforcing angles between the rear and front baffles. These help to sturdy things up a bit and gives me something to hang my control cables and other things from within the compartment.
In order to get a good fit on the cover, I decided to mount home-made angles around the perimeter of the baffles. I bent these and used my shrinker/stretcher to get them to fit to the eventual contours of the cover.
The cover itself was fit starting at the back edge and working my way around. I will use screws to mount the cover to the two supporting angles and to the front covers. The other holes are where I will rivet the cover to the angles. With all the holes drilled, I will pull the cover and the angles off of the baffles and rivet everything together.
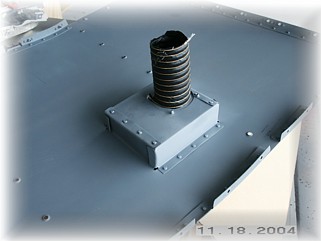
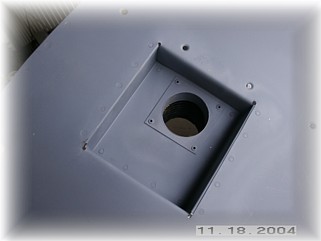
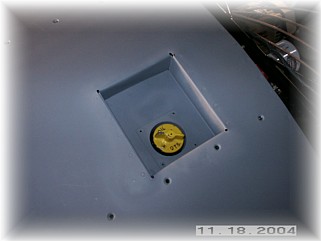
Once I had the cover fabricated, I looked at the opening necessary to get to the dipstick. What I found is that it was impossible to reach unless the floor of the opening was below the yellow knob of the dipstick. So I fabricated a box and used a scrap piece of SCAT tubing that will slide down over the dipstick. It's jobs like this that that pan and box brake are worth every penny I paid for it. No need to put clamps on the SCAT, it is slightly longer than necessary gets compressed when the plenum top is installed.
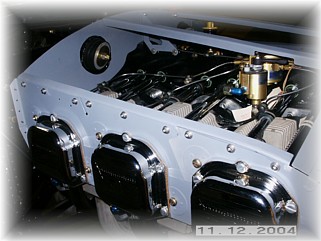
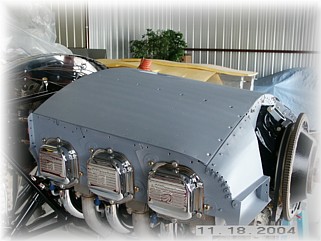
This is what it looks like with the plenum top installed and with the top cowling in-place. It's pretty easy to reach and unscrew.
That finishes the plenum and baffles for now. Once I am finished with mounting all the electrical, hose, and cable stuff, I will disassemble everything and paint them.
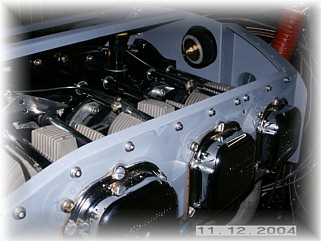
Here's a couple of shots of the finished baffle/plenum. You can click on the picture for a larger version of the picture. Next step is to mount the oil cooler. That work begins on the next page. |
||
|
"The secret to my success was that I managed to live to fly another
day." |